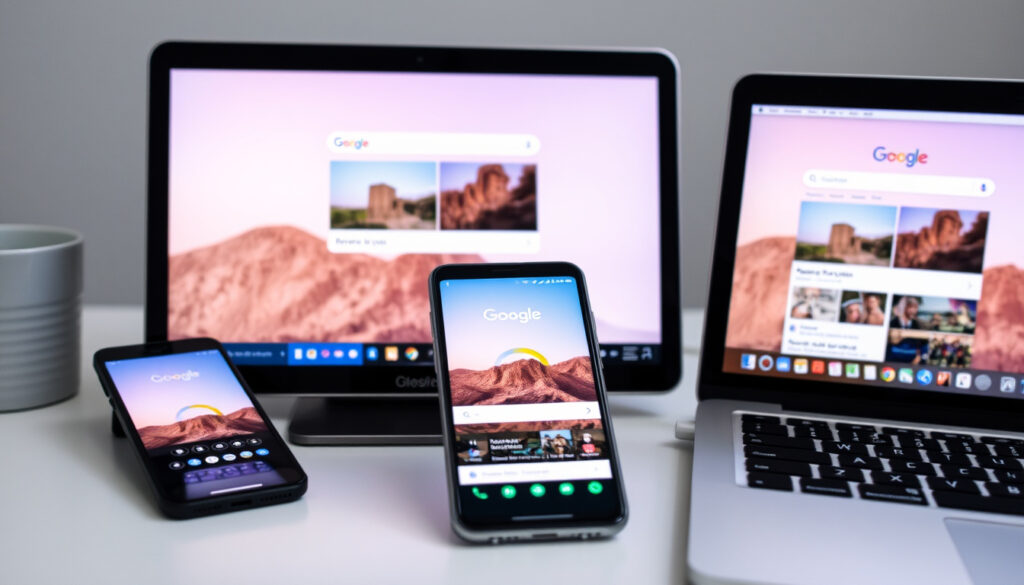
Google Image Search Reverse: How to Do It on Any Device
You’ve spotted a photo online and something feels off — maybe it’s been edited, or you want to track down where it originally appeared. Reverse image search lets you do exactly that, and Google makes it free and accessible across desktop, phone, and tablet. Whether you’re working with a saved photo, a screenshot, or even a face, here’s how to put Google’s image search to work for you.
TinEye indexed images: 83.3 billion · Reverse search supports: photos, screenshots, URLs · Mobile compatible: iPhone, Android · Official Google guide: available at support.google.com
Quick snapshot
- Google supports reverse search on computer and phone (Zapier (Technology how-to guide))
- Desktop upload supports .jpg, .png, .bmp, .webp formats (Zapier (Technology how-to guide))
- Official Google file size limits for uploads not publicly documented
- Regional availability of specific Lens features not confirmed
- Google Lens integration in image search became standard before 2023
- Mobile-first interface shift visible across all Google properties
- AI overviews now appear in reverse search results
- Dedicated face search tools gaining mainstream attention
The table below summarizes the key capabilities of Google’s reverse image search service across different platforms and use cases.
| Feature | Details |
|---|---|
| Primary tool | images.google.com |
| Mobile support | Yes, via app or browser |
| Screenshot compatible | Yes |
| Focus adjustment | Yes, by drag (Google Lens) |
| Facebook/Instagram built-in | No (screenshot workaround required) |
| Apple Photos internet search | No (local library only) |
| Supported desktop formats | .jpg, .png, .bmp, .webp |
| Desktop site required (Safari) | Yes |
| Alternatives for faces | TinEye, PimEyes |
How do I reverse search Google images?
Getting started with reverse image search on Google is straightforward. The method varies slightly between desktop and mobile, but the core idea is the same: you point Google to an image, and Google finds where it appears online.
On desktop computer
- Open images.google.com in your browser
- Click the camera icon in the search bar
- Choose to upload an image file, paste an image URL, or drag and drop the image directly
- Google processes the image and displays matching or similar results
The desktop route works best when you have the image file saved locally or can copy its web address. Chrome users can also right-click any image on a webpage and select “Search image with Google Lens” — a shortcut that bypasses the main images.google.com interface entirely. Desktop upload supports .jpg, .png, .bmp, .webp formats via Google Lens on google.com.
Using image URL
If you have a link to the image rather than the file itself, paste the URL into the camera icon search box. Google fetches the image and runs the search. This is handy when you’re analyzing a product photo, a profile picture, or any image hosted online.
Via Google Images camera icon
The camera icon on images.google.com accepts three input methods: uploading from your device, pasting an image URL, or dragging the image file directly into the browser window. Once submitted, Google’s systems analyze visual features and surface related content from across the web. Google will automatically display an AI overview of your search, plus any other relevant links.
Google Lens ranks as the easiest method for performing reverse image search on either a computer or a phone, according to guides from CCleaner. Desktop users benefit most from the drag-and-drop shortcut; mobile users have Lens built directly into the app.
Can I reverse image search on my phone?
Yes — and for most people, the phone is now the default starting point. Google has integrated Lens directly into its mobile ecosystem, making the process feel native rather than bolted on.
Using Google app
- Open the Google app on your phone (available for iOS and Android)
- Tap Images after running any search
- Select an image from the results
- Tap the Google Lens icon to run the reverse search
- Adjust the focus area by dragging if needed
On mobile, reverse image search from search results involves entering a query, switching to the Images tab, enlarging the image, and using Google Lens to focus on specific areas. This flow works on both iPhone and Android using the Google app.
Chrome browser on mobile
- Open images.google.com in Chrome on your phone
- Tap the camera icon to upload or take a photo
- Grant camera or photo library access when prompted
- Google processes and returns results
To upload personal images for reverse search on mobile: tap Google Lens icon in the search bar, take a photo or upload from album, and adjust borders if needed. On desktop Chrome, for webpage images, ensure you have the latest Chrome, scroll to the image, and tap Google Lens in the toolbar or from the address bar dropdown. Google Lens automatically focuses on the main image subject, adjustable by user drag.
What is a reverse image search?
Reverse image search is a content-based image retrieval technique. Instead of typing words, you submit an image and let visual algorithms find matches. Google compares your image against indexed content across the web and surfaces results ranked by similarity.
How it works
When you upload an image to Google Images or Google Lens, Google’s systems analyze visual features — colors, shapes, textures, patterns — and compare them against a vast index of web images. The engine looks for exact matches, near-duplicates, and visually similar images. Results typically include pages where the image appears, pages that link to it, and pages with similar visual content.
Common uses
- Source verification: Track down the original photographer or publication
- Copyright checks: Confirm whether an image is in use elsewhere before publishing
- Duplicate detection: Find all instances of a product photo, press release image, or meme
- Object identification: Look up landmarks, products, plants, or animals
- Related content discovery: Find higher-resolution versions or alternative crops
Reverse image search reportedly helps avoid copyright issues when using an image, find related content, and check image popularity across the web. Apple Photos app allows searching your own library by date, place, people, category, events, caption, and more — but Apple Photos search is local library only, with no web-based reverse search functionality built in.
“Reverse image search is very helpful to avoid copyright issues when using an image.”
— YouTube tutorial creator in a Safari reverse search guide
Can I reverse image search a screenshot?
Yes. Screenshots are simply image files, and Google treats them like any other uploaded photo. The workflow is identical: upload or paste the screenshot, and Google runs the search.
Steps for screenshots
- Capture the screenshot using your device’s built-in tools
- Open images.google.com in any browser
- Click the camera icon and upload the screenshot file
- Review the results for matches or similar images
Screenshots can be used for reverse image search by uploading them as personal images — this includes social media posts, news articles, memes, or any content that can’t be directly saved. The approach works consistently across desktop and mobile browsers. Facebook and Instagram lack built-in reverse image search; the workaround is to screenshot the image and upload to Google.
Screenshots are often the only way to reverse search content from platforms that block direct image saving. When a Facebook post, Instagram Story, or locked webpage contains an image you want to trace, a screenshot bypasses that restriction entirely.
How to do a reverse image search on a photo of a person?
Face search is the most sensitive category of reverse image search. Google Images and Google Lens can identify people in photos, but the results are mixed — especially for less public figures or images with limited online presence.
Google method
- Open images.google.com or use Google Lens
- Upload or search the photo containing the person
- Review the AI overview and matching results
- Tap specific regions to refine the search focus
Google’s reverse search on face photos works like any other image search, though face recognition is not the primary optimization. Visual Look Up in iPhone Photos identifies objects but does not perform internet reverse search — it only works with locally stored images on your device.
Face recognition alternatives
- TinEye — indexes over 83.3 billion images; strong for exact match tracking
- PimEyes — dedicated facial recognition search; higher hit rate for faces than Google
For face photos specifically, Google Images or Lens serve as a starting point, but TinEye or PimEyes tend to yield more relevant results. Google prioritizes objects, landmarks, and text over facial recognition. Face search tools can surface unexpected information, so users should understand the privacy implications before searching unfamiliar faces.
What are the best alternatives to Google reverse image search?
Google isn’t the only option — and depending on what you’re trying to accomplish, alternatives may serve you better. TinEye excels at exact match detection, while Bing Visual Search offers comparable functionality for users embedded in the Microsoft ecosystem.
The comparison table below lists the most viable alternatives to Google’s reverse image search, including TinEye’s strength in tracking specific image matches across the web.
| Tool | Best for | Index size | Free |
|---|---|---|---|
| TinEye | Exact match tracking | 83.3 billion images | Basic search |
| Bing Visual Search | Visual similarity | Bing index | Yes |
| PimEyes | Face recognition | Facial database | Limited free |
| CopySeeker | Exact matches vs. similar | Web index | Yes |
TinEye maintains an index of over 83.3 billion images and specializes in tracking where specific images appear across the web — useful for photographers, journalists, and brand managers. Bing Visual Search works similarly to Google Lens: upload photo, URL, or take photo. CopySeeker reportedly provides more accurate results than Google Images, prioritizing exact matches over similar images, though searches take longer.
“The results are way more accurate and rather than seeing all kind of similar images you will see at the top the results.”
— Tutorial creator demonstrating CopySeeker effectiveness
Google works best for general visual discovery and finding similar content. TinEye wins when you need exact match tracking — tracing an image back to its original source, finding every page that has used a specific photo, or confirming whether an image has been republished without credit. Face searches generally perform better on PimEyes than on Google, though neither offers guaranteed results and both raise privacy considerations worth thinking through before use.
Google trades precision for breadth — it shows you related and similar images quickly. TinEye sacrifices speed for accuracy — searches take longer but surface exact duplicates. Choose based on whether you’re exploring or verifying.
Upsides
- Free on all devices with no account required
- Works on screenshots, URLs, and uploaded photos
- Google Lens adds smart focus on objects and text
- TinEye indexes 83.3 billion images for exact matching
- Mobile-first design works seamlessly on iPhone and Android
Downsides
- Face recognition accuracy is limited on Google
- No built-in reverse search on Facebook or Instagram
- Desktop site required for Safari direct uploads on iPhone
- CopySeeker claims accuracy advantage but is unverified
- Privacy implications of face search tools not always clear
Related reading: Canada 411 Reverse Lookup · Yahoo Mail Login, UK Access & Search Guide
youtube.com, youtube.com, discussions.apple.com, jacofallthings.com
Beyond basic uploads, this desktop and mobile tutorialexpands on troubleshooting tips for reverse searches across phones, desktops, and even iOS-specific quirks.
Frequently asked questions
Can I do a Google search using a photo?
Yes. Upload any photo to images.google.com or use Google Lens on mobile to run a search based on that image’s visual content. Google analyzes the image and returns matching or similar results from across the web.
Can Google do a reverse image search?
Yes. Google Images and Google Lens support reverse image search by accepting uploaded photos, pasted image URLs, or screenshots. Results include matching pages, similar images, and AI-generated overviews with contextual links.
Can I reverse search a picture on my iPhone?
Yes. Open the Google app or Safari, navigate to images.google.com, and use the camera icon to upload a photo from your library. On Safari, tap the “aA” icon and select “Request Desktop Website” to enable direct image upload without app redirects.
Is reverse image search free?
Yes. Google’s reverse image search is free and requires no account. TinEye offers basic free searches; advanced features require a paid subscription. PimEyes offers limited free searches with paid tiers for deeper access.
What is Google Lens for reverse search?
Google Lens is a visual search tool integrated into the Google app, Chrome, and images.google.com. It analyzes images you point it at — whether from your camera, a screenshot, or an uploaded file — and surfaces relevant web results, translations, product information, and similar images. It works as both a general visual search tool and a reverse image search engine.
What file formats does Google reverse image search support?
Desktop uploads support .jpg, .png, .bmp, and .webp formats via Google Lens on google.com. Mobile upload via the Google app accepts photos from your camera or photo library without requiring you to match a specific format.
Can I search for faces using Google?
Google reverse image search works on photos of people, but results are not optimized for facial recognition. TinEye and PimEyes are better choices for face-specific searches, though neither tool is perfect and both come with privacy trade-offs worth considering.
How accurate is reverse image search on mobile?
Mobile reverse image search through Google Lens and the Google app produces results equivalent to desktop search. The same indexing and matching algorithms run on both platforms. On iPhone, the Safari workaround for desktop-site mode delivers the same upload functionality as Chrome on Android.