How to Install Bathtub Faucet – Step-by-Step DIY Guide
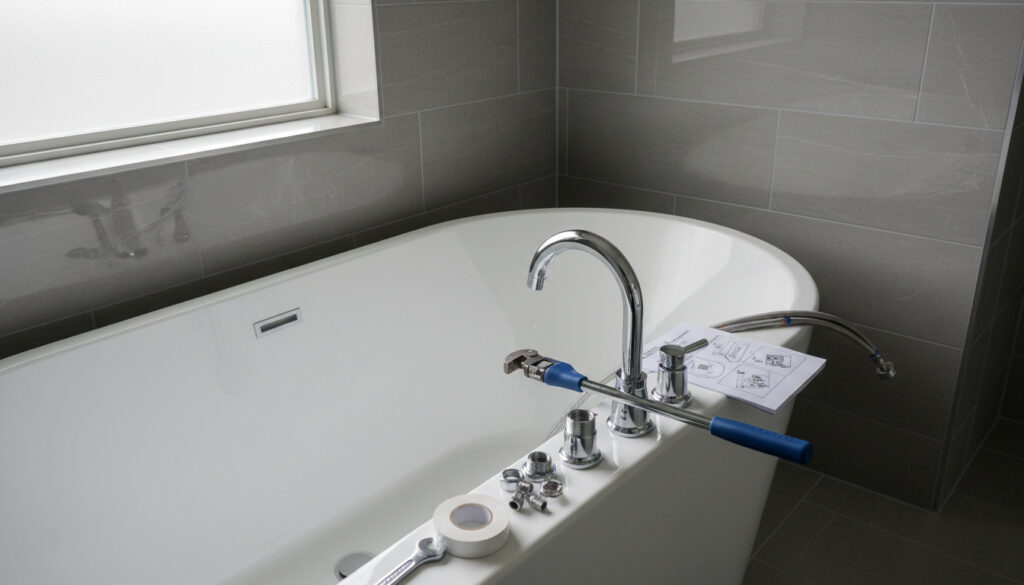
Bathtub faucet installation represents one of the most accessible entry points into residential plumbing repair. Most homeowners can complete this project in roughly one to two hours using basic hand tools and approximately twenty to fifty dollars in materials, depending on whether they choose a simple spout replacement or a full valve assembly upgrade.
The procedure accommodates various hardware configurations, including single-handle, widespread, and brand-specific models from manufacturers like Moen and Delta. Success depends primarily on identifying whether your existing setup uses a threaded nipple connection or a slip-on copper pipe design before purchasing replacement components.
What Tools and Materials Do You Need to Install a Bathtub Faucet?
Proper preparation prevents the most common installation failures. Home improvement centers stock most required consumables, while specialized tools remain optional for all but the most corroded legacy installations. How to Replace a Bathtub Faucet resources confirm that local shutoff valves eliminate the need for whole-house water disruption when available.
- Always locate and close water shutoff valves before disassembly to prevent flooding
- Pad all wrench jaws with tape or cloth to protect chrome and enamel finishes
- Apply PTFE tape clockwise on male threads to prevent binding during installation
- Compare new faucet reach and pipe diameter with existing copper or galvanized lines
- Place a non-slip mat in the tub before starting to prevent tool damage to the surface
- Keep penetrating oil accessible for seized set screws or corroded threaded joints
| Tool | Specific Purpose | Critical Notes |
|---|---|---|
| Adjustable wrench | Loosening supply nuts and compression fittings | Basin wrench preferred for tight spaces behind walls |
| Padded pliers | Gripping escutcheons and retaining nuts | Wrap jaws in duct tape to prevent scratching |
| Allen/hex keys | Releasing set screws on handles and slip-on spouts | Metric and imperial sets recommended |
| Phillips screwdriver | Removing decorative caps and trim plates | Magnetic tip aids retrieval of dropped screws |
| PTFE tape | Sealing threaded pipe joints | Wrap 2-3 layers clockwise; avoid over-winding |
| Silicone sealant | Waterproofing escutcheon perimeters | Bathroom-grade; apply to top and sides only |
| Penetrating oil | Freeing corroded or mineral-locked fittings | Allow 15 minutes dwell time before torque |
| Emery cloth | Sanding burrs from cut copper pipes | Ensures smooth surface for slip-on spouts |
How Do I Remove an Old Bathtub Faucet?
Identifying Spout Connection Type
Determining whether your existing spout is threaded or slip-on dictates the removal strategy. Threaded spouts screw onto a pipe nipple extending from the wall, while slip-on models slide over a copper tube and secure via a hidden set screw according to Home Depot specifications.
Disconnecting Handles and Trim
Remove decorative index caps with a flat screwdriver to access handle screws. Unscrew the handles counterclockwise, then detach the escutcheon plates secured by visible screws or compression threads. For full valve replacements, extract the cartridge after trim removal using manufacturer-specific pullers if necessary as demonstrated in video tutorials.
Extracting the Spout
For threaded spouts, grip the body with padded pliers and rotate counterclockwise until free. Slip-on spouts require locating the access hole on the underside, inserting the correct Allen key to loosen the set screw, then wiggling the spout forward off the copper pipe visual demonstrations confirm.
Place towels or cardboard across the tub basin before disassembly. Dropped wrenches or sharp trim edges can crack enamel or scratch fiberglass surfaces irreparably.
How Do I Install a New Bathtub Faucet Step by Step?
Preparing the Pipe Interface
Clean all remnants of old PTFE tape or pipe dope from threads using a wire brush. For slip-on applications, sand the copper tube with emery cloth to remove oxidation and ensure the new spout slides smoothly without catching.
Sealing and Spout Installation
Wrap fresh PTFE tape clockwise around male threads for two to three complete turns. Hand-thread threaded spouts to avoid cross-threading, then snug firmly with a padded wrench, orienting the outlet downward. For slip-on models, slide the spout until it contacts the wall plate, then tighten the set screw through the access hole without deforming the copper.
Apply PTFE tape clockwise around threads. Counterclockwise application unravels as you tighten the fitting, compromising the seal and potentially causing leaks behind the wall.
Valve Cartridge and Trim Assembly
Insert the new cartridge according to alignment marks, securing the valve body if the entire assembly was removed. Attach escutcheon plates with a thin silicone bead around the top and sides, leaving the bottom edge unsealed to allow weep drainage. Install handles loosely until water flow confirms temperature orientation, then tighten set screws.
Single-handle mixer valves require precise cartridge alignment to prevent scalding. Verify hot and cold supply lines match the cartridge markings before securing trim, and test rotational limits before final tightening.
How Do I Test the Installation and Fix Leaks?
Restore water supply gradually, opening the main valve halfway to pressurize lines slowly. Run the tub faucet for two minutes, checking all joints with a dry paper towel to detect seepage. Test the diverter by pulling up the shower knob, verifying smooth operation and no backflow installation standards recommend.
If leaks appear at the spout base, disassemble and reapply PTFE tape, ensuring the spout sits level against the wall. Handle leaks usually indicate loose set screws or misaligned cartridges; remove trim and reposition components before retightening.
How Long Does It Take to Install a Bathtub Faucet?
- Preparation and Water Shutoff: 10 minutes to locate valves, drain lines, and protect surfaces. Source
- Removal of Existing Hardware: 20 minutes to detach spout, handles, and clean pipe interfaces. Source
- New Faucet Installation: 45 minutes to seal threads, mount spout, install valve/trim, and apply silicone. Source
- Testing and Final Adjustments: 10 minutes to pressurize, check leaks, and align handles. Source
Can You Handle This Project Yourself?
| Established Capabilities | Uncertain or Complex Scenarios |
|---|---|
| Standard threaded or slip-on spout replacement with exposed copper or iron pipe | Wall-mounted faucets requiring access panel demolition or tile removal |
| Single-handle cartridge swaps using manufacturer-provided tools | Soldered copper connections requiring torch work and brazing skills |
| Basic leak troubleshooting using PTFE tape and silicone reapplication | Extensive corrosion or cross-threaded nipples fused inside wall cavities |
| Projects completed in 1-2 hours with adjustable wrenches and Allen keys | Valve body replacement behind finished walls without plumbing access |
Understanding Faucet Types and Replacement Timing
Two dominant spout designs prevail in residential bathrooms. Threaded spouts screw onto 1/2-inch NPT nipples, offering robust connections but requiring precise alignment to avoid cross-threading. Slip-on spouts utilize a compression set screw against a smooth copper sleeve, allowing faster installation but demanding exact pipe diameter tolerance—typically 1/2-inch or 3/4-inch specifications type identification guides confirm.
Replacement becomes necessary when visible corrosion, persistent dripping despite washer replacement, or diverter failure prevents proper shower routing. Single-handle models integrate temperature control within the valve body, while widespread configurations separate hot and cold handles, requiring more extensive wall access for valve body alignment.
Industry Guidance and Manufacturer Standards
Wrap new PTFE tape clockwise 2-3 times if male threads are present, ensuring the seal compresses properly as the fitting tightens.
— Monblari Installation Guide
Position shower arms at 6 to 7 feet above floor level when reinstalling diverter assemblies, ensuring proper spray angle while maintaining code clearance.
— Fine Homebuilding
Hand-tighten clockwise onto taped nipple, then light wrench snug; align downward; do not overtighten.
— Home Depot Plumbing Division
Essential Points for DIY Success
Successful bathtub faucet installation requires precise identification of your existing pipe configuration, methodical water shutoff procedures, and careful attention to sealing tape direction. Most homeowners complete standard spout replacements within two hours using basic hand tools, though wall-mounted or soldered configurations demand professional intervention. For detailed visual guidance, consult the Replacing a Bathtub Faucet Step-by-Step Guide before beginning your project.
Frequently Asked Questions
What are the most common mistakes when installing a bathtub faucet?
Overtightening threaded spouts cracks the casting or deforms copper pipes. Applying PTFE tape counterclockwise causes unraveling during assembly. Failing to leave a weep gap at the bottom of escutcheon plates traps moisture against the wall.
How do I install a bathtub faucet on a fiberglass tub surround?
Fiberglass units often use overflow plates or reinforced mounting blocks rather than direct wall studs. Verify backing material exists behind the surround before applying torque to spouts, or distribute pressure using wide escutcheon gaskets.
Do Moen and Delta faucets require different installation procedures?
Both brands follow standard plumbing connections, but cartridge alignment and set screw locations vary. Always follow the specific manufacturer insert included with your model, particularly regarding temperature limit stop adjustments.
Can I replace a faucet without shutting off the main water supply?
Local shutoff valves behind the tub allow isolated repair without house-wide disruption. If local valves are absent or seized, the main supply must be closed to prevent pressurized water release during disassembly.
Why does my new faucet drip from the spout after installation?
Residual water in the drop ear or incomplete cartridge seating causes temporary dripping. If persistent, the cartridge O-rings may be damaged or the valve body requires deeper cleaning before reassembly.
More related posts
 Big Marble Go Centre – Medicine Hat’s Family Recreation Guide
 Comedian Ron White: Biography, Divorce, Sobriety, Political Views
 Secrets Tulum Resort & Beach Club – Review and Expectations
 East Side Mario’s Calgary – Location Hours Menu Reviews
 Silicon-Insider About Gordon James: Verified Facts & Questions
 Fear of God Essentials Hoodie – Sizing Fit and Quality Guide
 Who Is Playing Hockey Tonight? NHL Games & TV (May 2026)
 Bo Bichette Contract Prediction 2025: Projections & Mets Deal